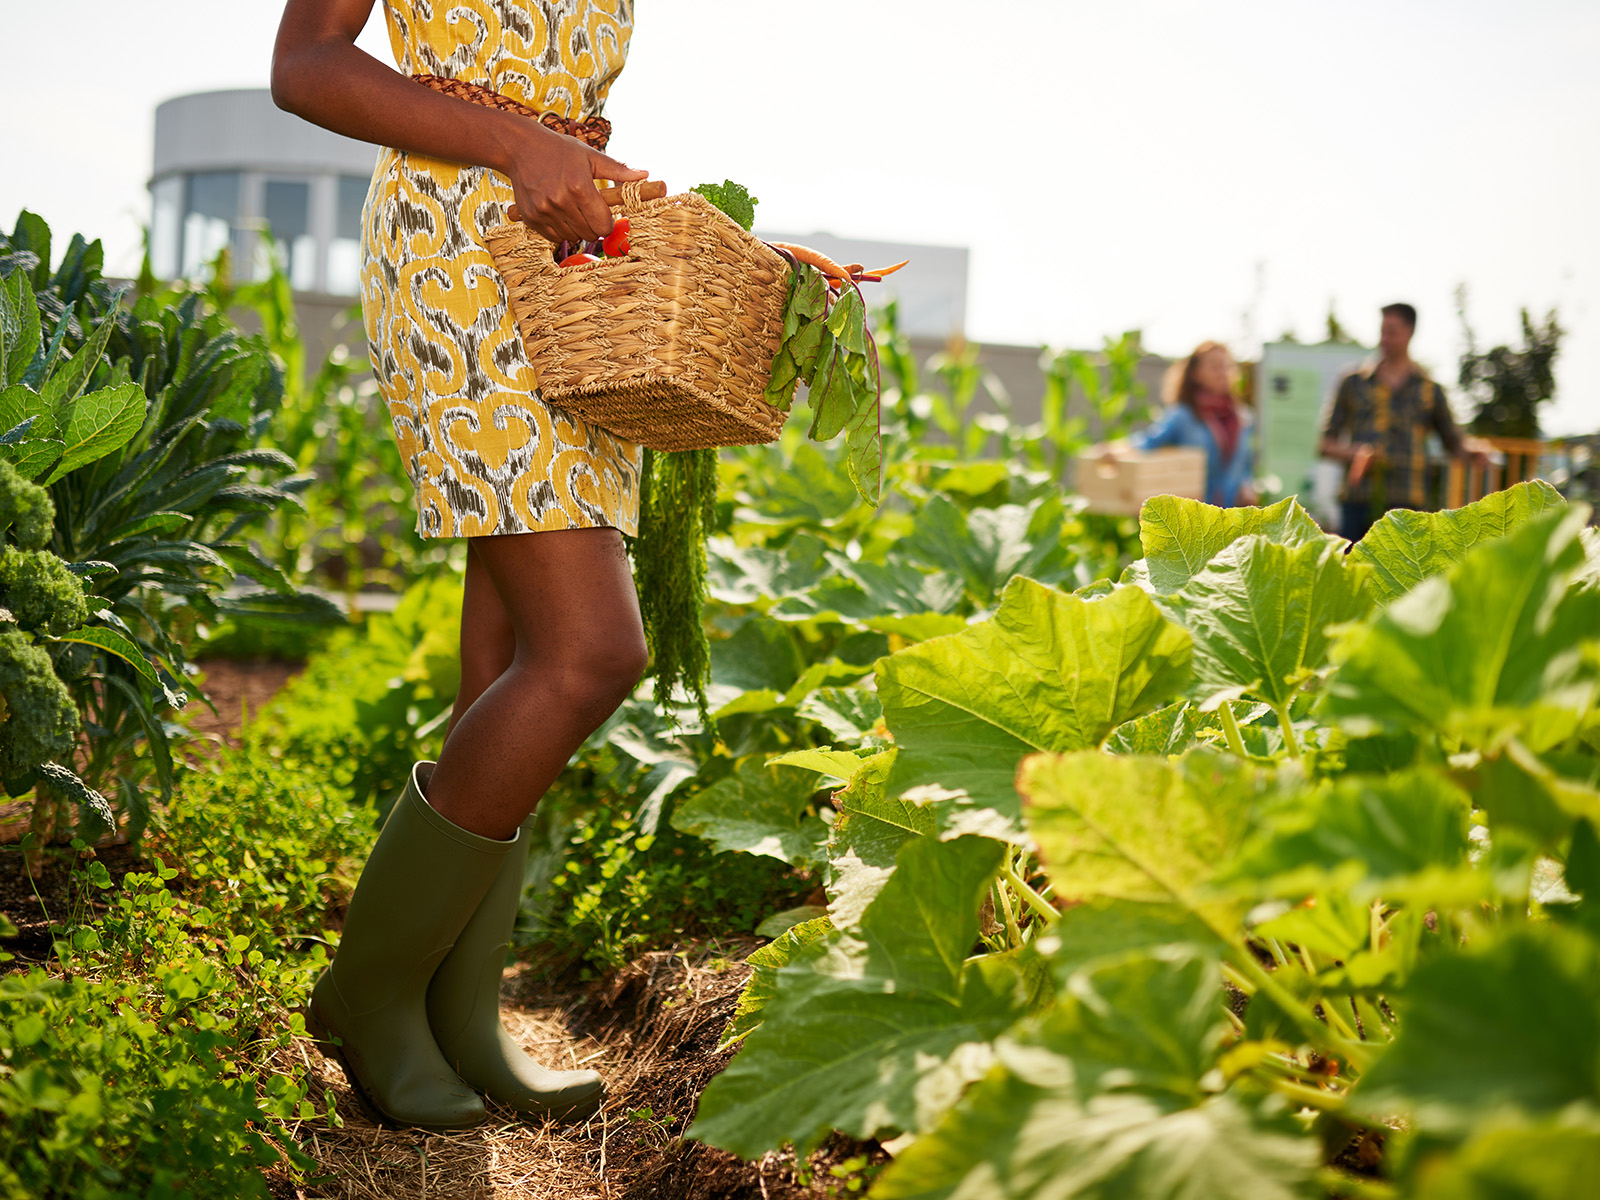
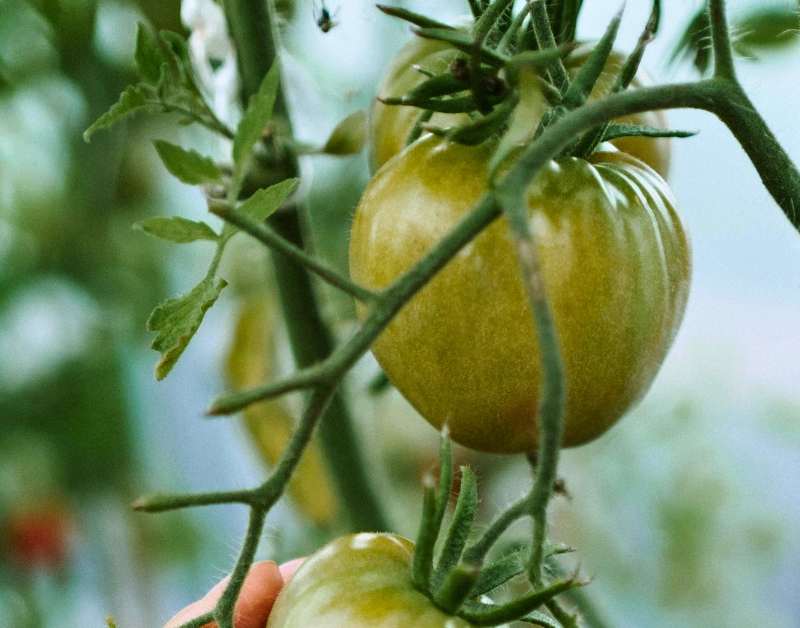
Category

Todas las Temporadas

Técnicas Efectivas para la Conservación de Agua

By cultive un jardin, Educación, Todas las Temporadas

La jardinería en Colorado requiere la implementación del uso consciente y efectivo de técnicas para la conservación del agua. Como organización, Los Jardines Urbanos de Denver (DUG) cree que los jardines comunitarios deben servir como modelo de estas técnicas, especialmente durante las épocas de escasez de agua.  Adicionalmente, el uso de técnicas de conservación de agua trae otros beneficios, incluyendo un costo menor para el agua y una reducción de la mala hierba.

Si se aplican las siguientes técnicas, las plantas responderán creciendo rápidamente y produciendo una cosecha abundante. Como respuesta a la sequía constante, también hemos definido un conjunto de restricciones de agua requeridas para todos los participantes en los jardines comunitarios. Independientemente de la duración de la sequía, DUG recomienda que todos sus miembros adopten e incorporen estas técnicas como una forma de vida.

Regar las plantas durante las horas frescas del día, especialmente en la tarde/noche
Regar a primera hora de mañana o una hora antes del atardecer, permite a las raíces de las plantas absorber y utilizar la humedad de manera más eficiente. El riego tardío permite que el agua penetre en el suelo durante 12 horas o más antes de que el sol y el viento aumentan los efectos de la evaporación y la transpiración del suelo y el follaje. El riego de medio día es un mal uso del tiempo y una manera extremadamente ineficiente de regar los suelos sedientos. Dado que las plantas hacen una cantidad significativa de su crecimiento durante la noche, tiene sentido proporcionar humedad antes de este período crítico. 

Regar las raíces y la tierra, no las hojas
Aunque algunas plantas, como la familia de brócoli y las lechugas, no se molestan por tener las hojas húmedas, la mayoría de las verduras prefieren el riego a nivel del suelo. En los tomates, los guisantes y los miembros de las familias de calabaza y melón el regar las hojas puede causar problemas de enfermedades que proliferan en el follaje húmedo.

Cultivar el suelo antes de regar
Es importante cultivar el suelo alrededor de las plantas y aflojar la tierra al menos una vez a la semana. Esto sirve para dos propósitos: cortar malezas germinadoras que compiten por la humedad y abrir nuestro suelo de arcilla pesada para que el agua pueda penetrar más fácilmente a niveles más profundos. El riego debe hacerse después del cultivo, mientras que el suelo esté suelto y ventilado.

Aplicar composta a lo largo de la temporada
La composta se debe aplicar al principio de la estación de la jardinería, cavando dos pulgadas de composta en las 4 – 6 pulgadas superiores de la tierra, así como varias otras veces durante el verano y el otoño. Mezcla una pala de compost alrededor de verduras, flores y hierbas, cultivando ligeramente el suelo para incorporar el material orgánico. Dado que la composta tiene la capacidad de soportar hasta el 100% de su peso en agua, esto permite que los suelos retengan y liberen humedad y nutrientes orgánicos lentamente. Tener suelos enriquecidos con composta es una de las mejores técnicas de conservación de agua disponibles para los jardineros.

Sembrar las plantas con suficiente espacio para que sus hojas maduras sombreen la superficie del suelo
El suelo que está bajo la sombra, incluso en condiciones de sequía, es más capaz de retener la humedad y reducir la evaporación. El mini-clima que es producido por las plantas que se espacian de modo que las hojas maduras casi se toquen proporciona el sombreado y los efectos de enfriamiento en la superficie del suelo abajo. Usted puede extender la temporada de crecimiento de las plantas de temporada fría, como la lechuga, sembrándolas a la sombra de plantas más altas como las alubias. Sus hojas proporcionan un “pajote vivo” para ayudar a enfriar las raíces de las plantas circundantes y retener la humedad.

Agregar un mantillo a cualquier área de suelos descubiertos
Un mantillo de material orgánico conserva el agua, modera la temperatura del suelo, ayuda a prevenir la erosión y enriquece lentamente el suelo con humus a medida que se descompone. Los recortes de césped sin pesticidas que se han secado durante algunos días, la paja y las hojas de otoño son excelentes fuentes de mantillo. Las áreas expuestas del suelo que no se están utilizando se convierten en zonas desagradables donde la mala hierba crece rápidamente y son espacios donde ocurre la evaporación inútil. Coloque cultivos de temporada cálida, como tomates y chiles, después de que el suelo se caliente. Cosechar los cultivos de temporada fría, como la lechuga, los guisantes y el brócoli varias semanas después de haber sido trasplantados o después de haber estado creciendo durante un mes después de la germinación. 

Revise el suelo para juzgar la humedad
La mayoría de las verduras necesitan alrededor de una pulgada de agua por semana para un crecimiento adecuado. Empuje un palo o su dedo una pulgada a dos pulgadas debajo de la superficie del suelo para verificar si necesita agua. Los suelos que están expuestos al sol (sin mantillo), y son deficientes en materia orgánica, serán significativamente menos eficientes en la retención de humedad y nutrientes que aquellos que están sombreados y enriquecidos con composta.

Las hojas que se marchitan no siempre señalan una llamada para más agua
Las plantas de hojas grandes, como las de la familia calabaza, normalmente caen durante el calor del día. Las plantas están minimizando la pérdida de agua (debido a la transpiración) y regarlas en este momento aumentará la pérdida de agua en lugar de disminuirla. También debilita las plantas mediante la promoción de la estructura de raíces poco profundas.

Utilizar herramientas de riego eficientes
El uso de una varilla de riego manual con una boquilla de cierre le permite regar debajo de las hojas y cerca de la superficie del suelo. Esto también rompe la fuerza de la pulverización y disminuye los efectos de la compactación y la erosión del suelo. El agua con un aerosol de bajo volumen permite que el agua penetre profundamente en el suelo. Los suelos arcillosos absorben el agua lentamente. Regar por un corto período de tiempo, permitiendo que el agua infiltre la capa superior y luego remojar el área es una técnica de riego más eficiente en lugar de riego corto e intenso. Como opción para riego manual sugerimos el uso de una manguera negra tipo “diluvio” lleno de hoyitos que serpentea a través de su jardín en la base de sus plantas.

Cosechar con frecuencia
La cosecha de cultivos, mientras que las plantas están produciendo activamente, es saludable. Las plantas cubiertas con insectos y / o plantas cargadas de enfermedades deben ser removidas y el área replantada con otro tipo de planta o sembrada con un cultivo de cobertura. Cuando la planta está tomando más de la tierra que regresa, es hora de concentrarse en el mejoramiento del suelo.

¿Cuándo Cosechar los Vegetales? Siga estos consejos para obtener lo mejor de su jardín

By cultive un jardin, Educación, Todas las Temporadas

Part of having a garden is enjoying vegetables, fruits, and herbs at their peak. Follow these guidelines to get the best of your garden.

Asparagus: Begin harvesting when spears are 6-8 inches tall and about as thick as your small finger. Snap them off at ground level and new spears will continue to grow. Stop harvesting about 4-6 weeks after the initial harvest, to allow the plants to produce foliage and food for themselves.

Beans, Green: Pick before you can see the seeds bulging. They should snap easily into two. Check daily. It doesn’t take long for beans to go from tender to tough. 

Beets: Harvest and eat the greens that you thin out of the rows. It’s a matter of personal preference when it comes to the right size for harvesting. They are ready any time after you see the beets shoulders protruding at the soil line. 

Broccoli: We eat the unopened flower buds of broccoli, so check frequently, especially as the weather warms up, to ensure you don’t let the flower heads bloom. Don’t expect your home grown broccoli to get to the size of supermarket heads. Harvest when the buds are about the size of a match head. Use a knife to cut below the main crown to harvest. Once the central crown is harvested, smaller broccoli spears will grow as side shoots.

Brussels Sprouts: The sprouts will mature from the bottom up. You can begin harvesting once the sprouts are at least an inch in diameter. Harvest by twisting off or cutting the sprout from the stem. 

Cabbage: The cabbage head will feel solid when gently squeezed. Cabbage needs to be harvested when it reaches maturity or it will continue to grow and split open. Use a knife to cut at the base of the head. Large cabbage leaves that surround the head can also be harvested and used like cabbage. 

Carrots: Carrots can be hard to judge. The tops of the carrot will show at the soil line and you can gauge when the diameter looks right for your variety. If the diameter looks good, chances are the length is fine too. Pull one to be certain. Carrots can be left in the ground once mature. A light frost is said to improve and sweeten the carrot’s flavor. 

Cauliflower: Like broccoli, your homegrown cauliflower heads will probably not match supermarket size. Harvest when the head looks full and while the curds of the head are still smooth. Cut at the base of the crown with a knife.

Corn: About 3 weeks after silks form, they will dry and brown. Kernels should exude a milky substance when pricked. 

Cucumber: Check daily and harvest young. Timing and length will vary with variety. The fruits should be firm and smooth. Over ripe cucumbers can be very bitter or pithy, even before they start to turn yellow.

Eggplant: Slightly immature fruits taste best and should be firm and shiny. Cut the fruit from the plant. 

Garlic: Cut scapes off as soon as they mature, this encourages bulb formation. Garlic tops will fall over and begin to brown when the bulbs are ready. Dig, don’t pull, and allow to dry before storing. Brush off the dirt instead of washing.

Kale: Kale leaves can be harvested throughout the season. They should be a deep green with a firm, sturdy texture. Kale flavor is best in cooler weather. Harvest the largest outer leaves on a plant by simply grabbing a hold of the stem and pulling down. 

Kohlrabi: For the best texture, harvest once the kohlrabi bulb has reached about 2-3 inches in diameter. The bulbs become tougher as they grow and age. Pull or slice at the base. 

Leeks: Harvest leeks when they are about 1 inch in diameter. 

Lettuce, Head: Harvest once the head feels full and firm with a gentle squeeze. Hot weather will cause it to bolt or go to seed rather than filling out. Pull the entire head out. 

Lettuce, Leaf: Harvest the outer leaves once the plant has reached about 4 inches in height. Allow the younger, inner leaves to grow. Leaf lettuce can be harvested in this fashion for most of the summer.

Melons: There are many varieties of melons, but a general rule of thumb is that the color should change to beige and the fruit will slip from the vine when lifted. You should also be able to notice a sweet smell when ripe. 

Onions: Onions can be dug once the tops have ripened and fallen over. Brush the dirt off rather than rinsing and allow the onions to dry in the sun. 

Parsnips: Parsnips taste best if they are left in the ground until after a frost or two. They can be left in the ground over the winter and harvested in the spring. In cold areas, they should be mulched for the winter.

Peas: The pea pods should look and feel full. Peas are sweeter if harvested before fully plumped. Peas really need to be tasted to determine if they are sweet enough. 

Peppers: Each variety is different, but generally, peppers should be harvested when they turn the expected color. Carefully cut the pepper from the plant.

Potatoes: ‘New’ potatoes can be harvested when the tops start to flower. Carefully dig at the outer edges of the row. For full size potatoes, wait until the tops of the potato plants dry and turn brown. Start digging from the outside perimeter and move in cautiously to avoid slicing into potatoes. 

Pumpkins: Once the pumpkins have turned the expected color and the vines are starting to decline, check to make sure the skin has hardened enough that poking it with your fingernail will not crack it. Do not pick your pumpkin too soon because it will stop turning orange once it’s cut, but don’t leave them out in a hard frost either.

Radishes: Radishes mature quickly. You will see the shoulders of the bulbs popping out of the soil line. If left too long, they will become tough and eventually go to seed. 

Rutabaga: The bulbs should be about 3 inches in diameter, generally about three months after setting out. Rutabagas can be mulched, left in the ground and dug up as needed. Cold weather improves their flavor.

Swiss Chard: As with leaf lettuce, cut the large outer leaves at the base of the stem—being careful not to cut new growth—and allow the center to continue growing. 

Spinach: Spinach goes to seed quickly. Harvest by cutting at the soil line before you see a flower stalk emerging.

Squash, Summer: Pick young and check often. The skins should be tender enough to poke with your fingernail.

Squash, Winter: Color is a good indicator of winter squash maturity. When the squash turns the color it is supposed to be, cut from the vine. Do not let winter squash be exposed to frost. 

Tomatoes: Harvest when they are fully colored and slightly soft to the touch. Gently twist and pull from the vine. 

Turnips: Turnip shoulders should be about 2” in diameter at the soil line when ready. Overripe turnips are woody. 

Watermelon: The white spot on the bottom of the melon should change to a deep yellow when ripe. You may hear a change in the sound made when the melon is thumped with a finger. It should make a hollow sound when ripe.

Source: Gardening About